Filtered Language Menus with Prismatic WordPress Plugin
![]() Prismatic is a free WordPress plugin that adds syntax highlighting to code samples. You can use either Highlight.js or Prism.js to make your code snippets look amazing. This quick tutorial shares a way to customize Prismatic to save time scrolling thru a bunch of language options. Huge time-saver and simple to implement in a few minutes.
Prismatic is a free WordPress plugin that adds syntax highlighting to code samples. You can use either Highlight.js or Prism.js to make your code snippets look amazing. This quick tutorial shares a way to customize Prismatic to save time scrolling thru a bunch of language options. Huge time-saver and simple to implement in a few minutes.
The Goal
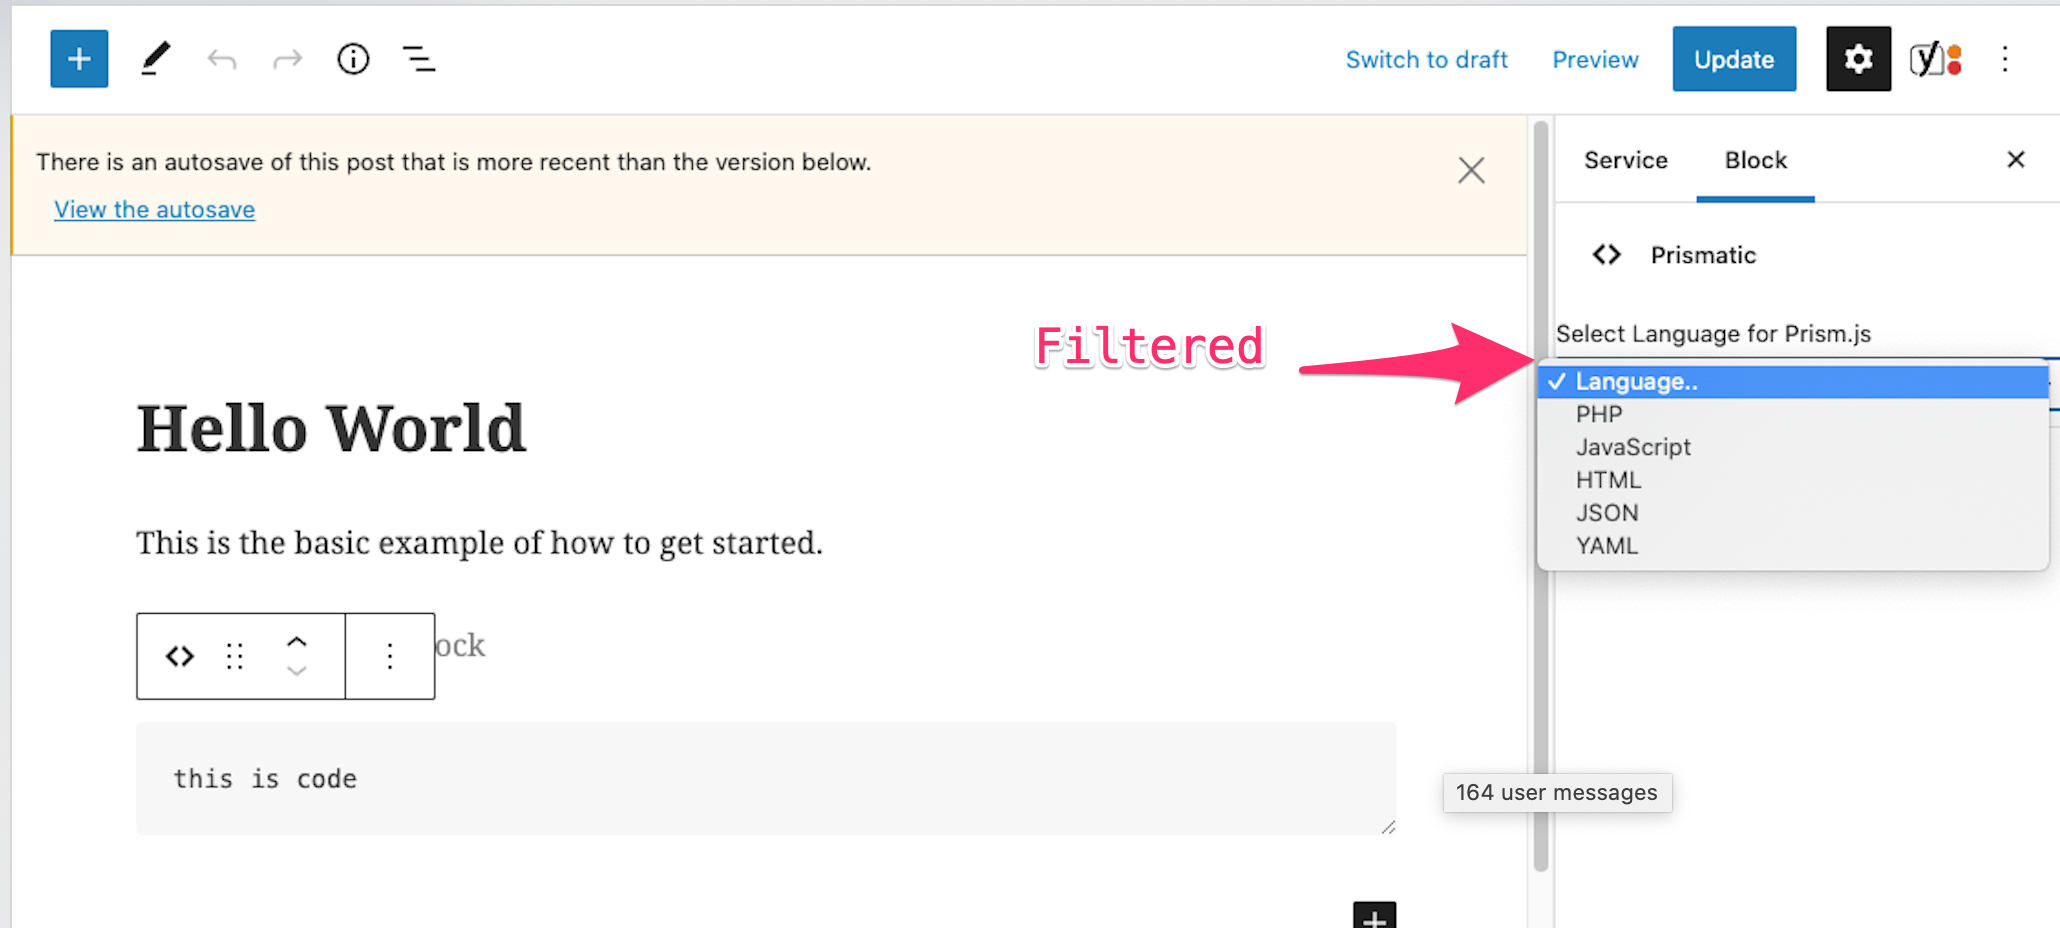
When enabled, Prismatic adds some blocks to the WordPress editor. The Prismatic block provides a dropdown/select menu, where you can choose from a long list of supported languages. It’s nice to have all those languages in the list, but if you’re only ever using a few different languages, it doesn’t make sense having to scroll through the many options.
So to improve workflow and save time, you can add some custom code to filter the language menus, so only your select few languages are listed. Here is a screenshot to give you a better idea of what we’re doing here:
Step 1: Add the JavaScript
In your WordPress theme folder, create a directory named /js/ (or whatever you would like to name it is fine). Then inside that folder, create a JavaScript file named prismatic.js (or any name you like). To that file, add the following code:
wp.hooks.addFilter('prismaticPrismMenu', 'prismatic/blocks', function(languages) {
	return [
		{ label : 'Language..', value : '' },
		{ label : 'PHP',        value : 'php' },
		{ label : 'JavaScript', value : 'javascript' },
		{ label : 'HTML',       value : 'markup' },
		{ label : 'JSON',       value : 'json' },
		{ label : 'YAML',       value : 'yaml' }
	];
});
You can customize the languages to whatever you want. Visit the Prismatic documentation for all the supported languages and respective abbreviations.
prismaticPrismMenu with prismaticHighlightMenu.Step 2: Add WordPress code
Next, add the following custom code to WordPress.
// Prismatic filter language menu
function prismatic_language_menu() {

	wp_enqueue_script('prismatic-language-menu', get_stylesheet_directory_uri() .'/js/prismatic.js', array('wp-hooks', 'wp-i18n', 'wp-blocks', 'wp-dom'), PRISMATIC_VERSION, true);

}
add_action('admin_enqueue_scripts', 'prismatic_language_menu');
In Step 1, we used /js/ for the folder name, and prismatic.js for the file name. Notice in the code above, where it specifies the path relative to your WordPress theme, /js/prismatic.js. This tutorial is set up to use that specific path, but you can change it to whatever you prefer. Just make sure that the path matches up with whatever you’re using in Step 1.
After saving changes, the result will look similar to this:
Enjoy! :)


